
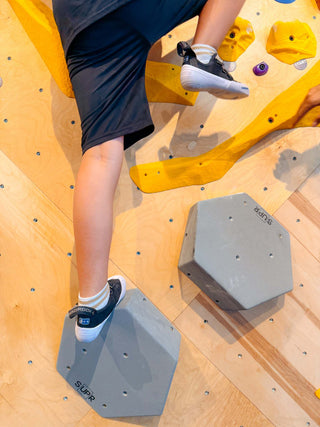
Walk into any bouldering gym and the walls look like a box of candy spilled across them. Big round blobs, thin ledges, smooth domes, tiny pockets. Each shape asks your hands to do something different. Once you can name the holds, you can read a problem, grip smarter and save your energy for the hard moves.
That’s one of the first things we teach in our rock climbing classes in Miami. Here’s a beginner’s guide to the most common types of climbing holds and how to use each one.
Why hold types matter
Most new climbers squeeze every hold as hard as they can. That burns out your forearms in minutes. Each hold has a “best” way to grip it, and using the right grip is often the difference between falling off and topping out.
Knowing hold types also helps you plan. Before you start a problem, you can look at the holds and guess what each move will feel like. Our guide to how to read a climbing route shows how to put that into practice.
Climbing holds at a glance
|
Hold |
What it looks like |
How to grip it |
Difficulty for beginners |
|
Jug |
Big, deep handle you can wrap your fingers around |
Relaxed, open hand, like carrying a bucket |
Easiest |
|
Edge |
Flat ledge, from a finger-width down to a few millimetres |
Half crimp or open hand on the flat top |
Easy to hard (depends on size) |
|
Crimp |
Small, thin edge that only fits your fingertips |
Half crimp; avoid the full crimp at first |
Hard |
|
Sloper |
Rounded, smooth dome with no lip |
Open palm, lots of skin contact, hips low |
Hard |
|
Pinch |
Hold you squeeze between thumb and fingers |
Thumb on one side, fingers on the other |
Medium |
|
|
Hole for one to three fingers |
Strongest fingers first (middle and ring) |
Medium to hard |
|
Side-pull |
Hold facing sideways |
Pull towards your body, lean away |
Medium |
|
Gaston |
Side-facing hold you push away from you |
Elbow out, push like opening elevator doors |
Medium to hard |
|
Undercling |
Hold facing down |
Palm up, pull up, push your feet into the wall |
Medium |
Jugs: the beginner’s best friend
Jugs are the big, positive holds you can wrap your whole hand around. Most beginner problems are full of them. Hang from them with straight arms, keep your grip relaxed, and let your legs push you up.
Jugs are also the best place to rest mid-climb. Shake out one arm at a time while the other hand holds the jug.
Edges and crimps: small holds, big precision
An edge is any flat ledge. A large edge feels like a shelf. A small one, which climbers call a crimp, might only fit the first pad of your fingers.
There are three main ways to grip them:
1. Open hand: fingers fairly straight, the gentlest on your joints.
2. Half crimp: fingers bent at about 90 degrees. This is the go-to grip for most small edges.
3. Full crimp: fingers bent sharply with your thumb wrapped over your index finger. It’s very strong, but it puts a lot of strain on your finger tendons.
Beginners should stick to open hand and half crimp. Save the full crimp until your fingers have had months to adapt. A common myth is that you need huge finger strength for small holds. Technique and footwork matter more. Read more in is grip strength really the limiting factor in climbing?
Slopers: friction, not force
Slopers are smooth, rounded holds with no edge to grab. You hold them with friction, so the more skin you get on the hold, the better.
• Use an open hand and spread your fingers.
• Keep your arms straight and your hips low, under the hold.
• Move smoothly. Jerky moves pull your hand off.
• Slopers feel easier when it’s cool and dry, so chalk up first.
Pinches: use your thumb
A pinch is a hold you squeeze between your thumb and fingers. Wide pinches feel like gripping a book; narrow ones feel like pinching a ruler. Your thumb does a lot of the work, so actively press it in rather than letting it rest.
Pockets: pick the right fingers
Pockets are holes in a hold. They’re named by how many fingers fit: monos (one finger), two-finger pockets and three-finger pockets. Use your middle and ring fingers in a two-finger pocket; they’re the strongest pair. Go in gently and never let a finger twist inside a pocket.
Side-pulls, gastons and underclings: holds that face the “wrong” way
Not every hold faces down at you. For these, your body position does most of the work:
• Side-pull: the hold faces sideways. Pull it towards your body and lean the opposite way.
• Gaston: a side-facing hold you push away from your body, elbow pointing out.
• Undercling: the hold faces down. Grab it palm-up, pull upwards and push your feet hard into the wall.
These moves often feel awkward at first. That’s normal, and it’s a sign you’re learning real technique.
Don’t forget footholds
Footholds come in the same shapes, just smaller: little edges, tiny chips and smears (pressing your shoe flat against the wall when there’s no hold). Placing your feet carefully, on the very front of your shoe, takes weight off your arms. Sloppy footwork is one of the common rock climbing mistakes beginners make.
What about volumes?
Volumes are the big geometric shapes bolted to the wall, often with smaller holds attached. They change the angle of the wall and create new places for hands and feet. We’ll cover them, along with slab and overhang walls, in a dedicated post later this month.
Where to practise every hold in Miami
At Las Rocas, our setters use premium holds from top brands and set new problems every day. We turn over the whole gym every six weeks, so you’ll always find new combinations of jugs, crimps and slopers to try.
Want to practise one hold type over and over? Our 12’x12’ adjustable Kilter Board lets you filter thousands of problems and repeat them as often as you like.
Beginner tips for gripping holds
1. Grip only as hard as you need to. Relax your hand between moves.
2. Keep your arms straight when you can. Bent arms tire out fast.
3. Look at your feet before you look at the next handhold.
4. Chalk up before slopers and small edges, not halfway through.
5. Warm up on jugs before you try crimps or pockets.
6. Ask a coach to watch you. Small grip changes make a big difference.
Climbing holds FAQ
What are the easiest climbing holds for beginners?
Jugs. They’re large and deep, so you can hold them with a relaxed, open hand.
What is the hardest type of climbing hold?
It depends on the climber, but small crimps and slopers are usually the hardest for beginners. Crimps need precise finger position, and slopers need good body position.
Is crimping bad for your fingers?
The full crimp puts extra strain on your finger tendons, so beginners should use the open-hand or half-crimp grip instead. Build up gradually and stop if your fingers hurt.
What is the difference between an edge and a crimp?
A crimp is a small edge. Climbers usually call an edge a crimp when it’s thin enough that only your fingertips fit on it.
How do I get better at slopers?
Keep your arms straight, your hips low and your movement smooth. Practise on slopers at an easy grade until you trust the friction.
Do I need my own climbing shoes to practise footholds?
No. First-time visitors at Las Rocas get free shoe and chalk rentals.
Put your hands on every hold
The best way to learn hold types is on the wall with a coach. Book an Intro to Climbing + Day Pass ($60). You get a coached lesson, shoe and chalk rentals, and the rest of the day to practise.
Already know you’ll be back? Buy a day pass and, if you join the same day, we’ll put it toward your membership.
